Implementing A Dark Mode Feature Using Css And Simplified Javascript Codes
A step-by-step guide on how to implement Dark mode on websites.

Hello, I'm Daniel. A front-end developer and a professional technical writer. I enjoy documenting my projects and learning new things.
There’s no denying that the Dark mode feature has grown to become one of the most highly sought-after software features of all time. This feature is so popular that we tend to see it in apps we use every day. From mobile to web apps, Dark mode has become a go-to solution for companies that want to protect their user’s eyes from excess light exposure. As a developer, gaining the required knowledge on how to implement a dark mode will definitely prove useful when working on new projects or modifying preexisting projects.
While there are several ways to go about implementing a Dark mode feature, we will dabble into one of the ways in this article.
Keep reading!
What is Darkmode?
Dark mode is basically a design feature that allows users to view light text and design elements on a dark background as against a default view of dark text and design elements on a light background. This feature makes it easier for users to view the screen of mobile phones, tablets, or computers as it drastically reduces the light rays emitted by screens while maintaining the color-contrast ratio needed for readability.
While some websites simply display their contents in Darkmode, others allow the user to choose between light and Darkmode depending on their choice.
IMPLEMENTING A DARK MODE FEATURE
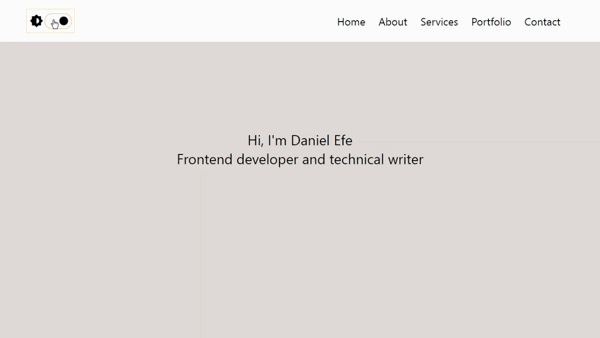
We have discussed what a dark mode is and even gone further to state its importance as well as its application; it is now time to take a step further by implementing a dark mode feature on a simple website. In this tutorial, we would create a webpage that contains a navigation bar and one main section. At the end of this tutorial, you would have a webpage that allows you toggle on its theme.
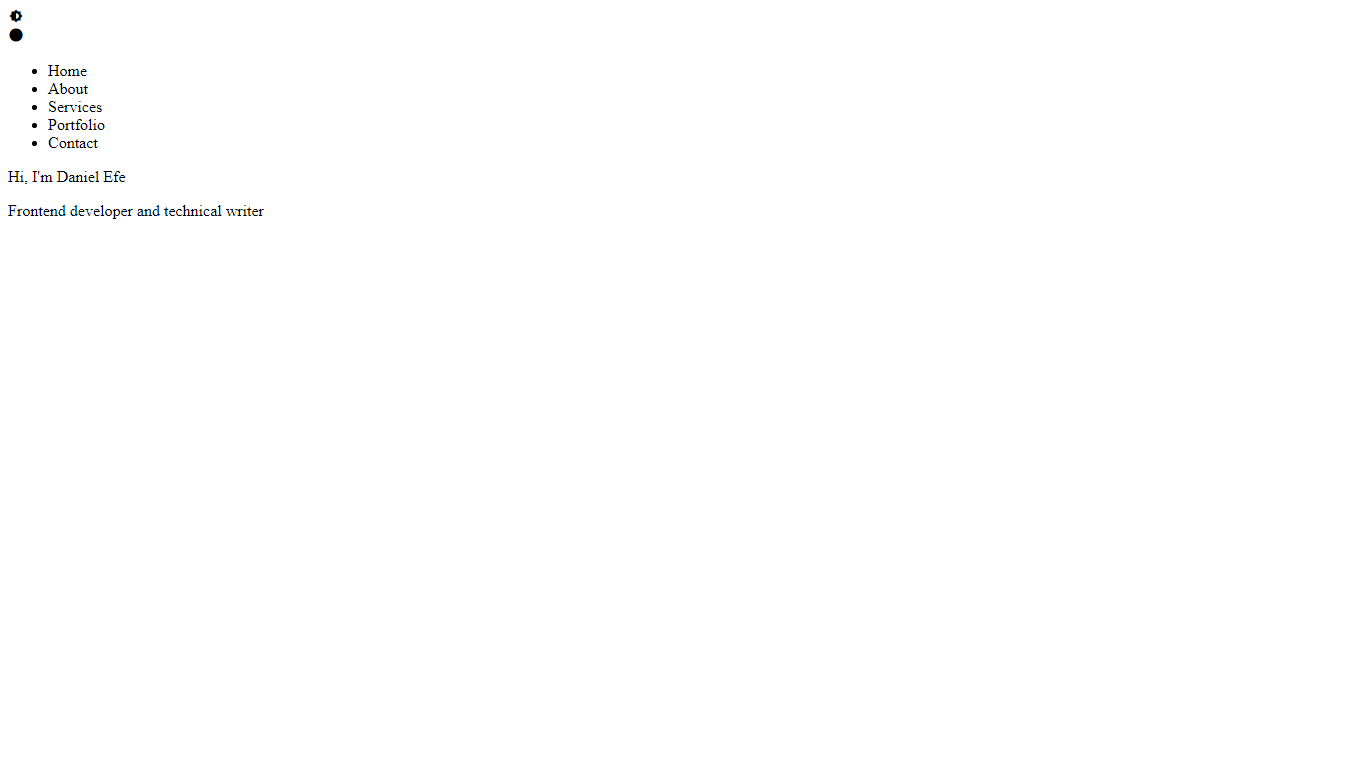
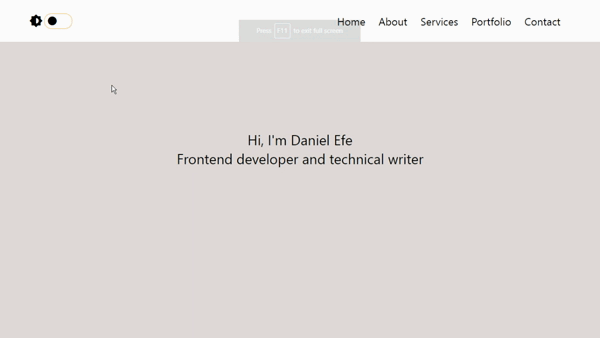
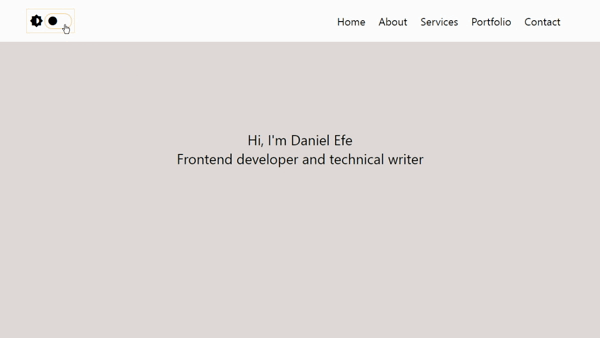
Below is what our final result will be:

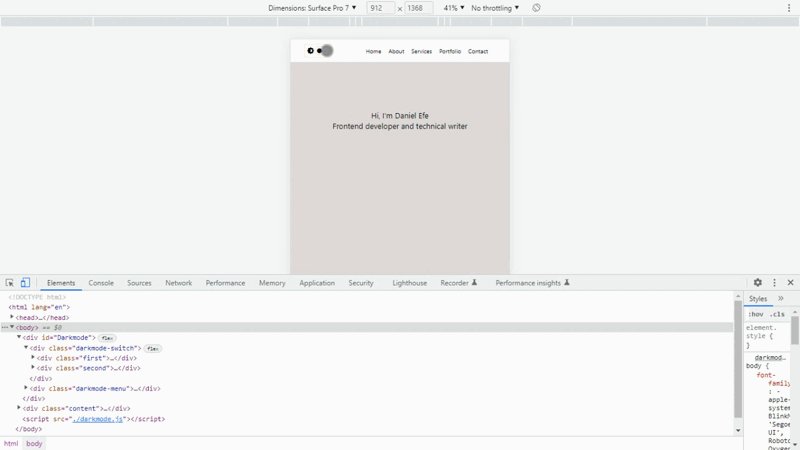
HTML MARKUP
Our HTML markup for the Darkmode is quite simple.
<body>
    <div id="Darkmode">
        <div class="darkmode-switch">
            <div class="first">
                <i class='bx bxs-brightness-half'></i>
            </div>
            <div class="second">
                <i class='bx bxs-circle'></i>
            </div>
            </div>
    <div class="darkmode-menu">
        <nav>
            <ul>
                <li>Home</li>
                <li>About</li>
                <li>Services</li>
                <li>Portfolio</li>
                <li>Contact</li>
            </ul>
        </nav>
    </div>
    </div>

    <div class="content">
        <p>Hi, I'm Daniel Efe</p>
        <p>Frontend developer and technical writer</p>
    </div>

    <script src="./darkmode.js"></script>
</body>
Basically, our HTML markup contains four main div tags. The first div tag with an id of Darkmode (<div id= “Darkmode”>) wraps the entire Darkmode menu. Our second div tag with a class of darkmode-switch (<div class= “darkmode-switch”>) wraps the icon required to implement our Dark mode. Our third div tag with a class of darkmode-menu (<div class= “darkmode-menu”>) wraps the navigation menu. Our last div tag with a class of content (<div class= “content”>) holds the content of our webpage.
As can be observed, I imported icons from the Boxicons library, so including its link in the head section of our HTML is necessary to get it working
<head>
    <meta charset="UTF-8">
    <meta name="viewport" content="width=device-width, initial-scale=1.0">
    <title>Darkmode</title>
    <link rel="stylesheet" href="darkmode.css">
    <link href='https://unpkg.com/boxicons@2.1.4/css/boxicons.min.css' rel='stylesheet'>
</head>
Output:
CSS MARKUP
For our CSS markup, we start by setting the style of our entire webpage using the *{} syntax. We set the margin and padding to zero and the box-sizing property to border-box. The importance of the box-sizing property is to prevent elements of our webpage from taking up more space when padding is set on them.
/*sets the margin and padding of our entire page to zero*/
*{
    margin: 0;
    padding: 0;
    box-sizing: border-box;
}
Output:
We take a step further by setting the style of the body of our page. We set the background color and font color to white and black respectively. This would automatically become the style of our light mode.
/* sets the style of the body of our webpage*/
body{
    font-family: -apple-system, BlinkMacSystemFont, 'Segoe UI', Roboto, Oxygen, Ubuntu, Cantarell, 'Open Sans', 'Helvetica Neue', sans-serif;
    background: rgb(226, 219, 219);
    color: black;
}
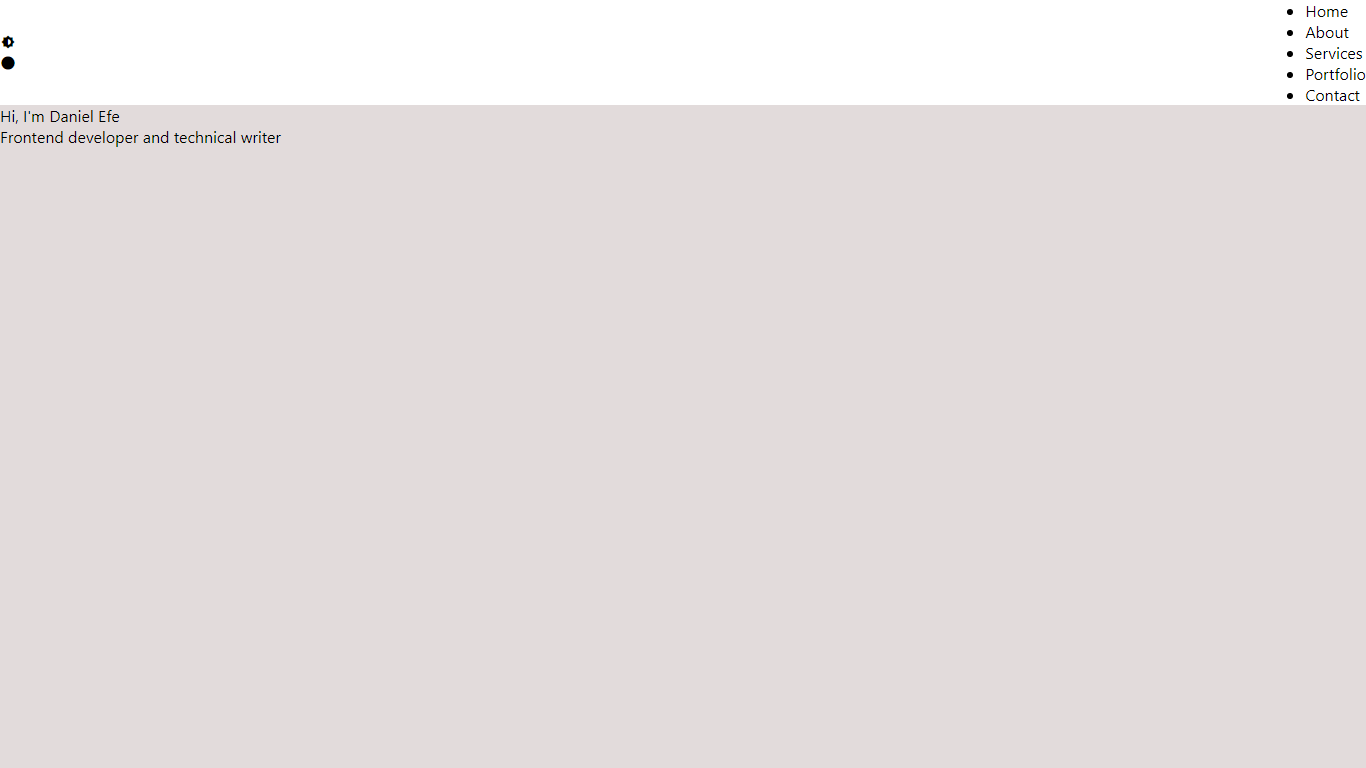
It is now time to apply style to our div tag with the Darkmode id. The <div id= “Darkmode”> contains two main div tags; first is the div tag with the Darkmode-switch class (<div class= “Darkmode-switch”>) and the second is the div tag with the darkmode-menu class (<div class= “Darkmode-menu”>). We set the display of these div tags to flex, thereby creating enough space between the two elements.
/*sets the style of our Darkmode menu and gives it a background color of white*/
#Darkmode{
    display: flex;
    justify-content: space-between;
    align-items: center;
    background: white;
    color: black;
}
Output:
moving to the interesting part, we set the required style for our Darkmode switch (<div class= “Darkmode-switch”>). From our HTML markup, you will see that our dark mode switch contains two div tags with classes of first (<div class= “first”>) and second (<div class= “second”>). We set the display of these tags to flex and apply other necessary styles. We also include certain styles to our Dark mode switch when our mouse hovers around it.
/*the darkmode-switch class holds two boxicon icons; one for brightness and the other for a circle
this style sets the display of our icons to flex*/
.darkmode-switch{
    margin: 20px 60px;
    font-size: 1.5em;
    width: 110px;
    height: 55px;
    justify-content: space-between;
    padding-left: 4px;
    display: flex;
    align-items: center;
}

/*adds a border to our darkmode-switch class when the mouse hovers around it*/
.darkmode-switch:hover{
    border: solid wheat 1px;
}
We set the styles of our div tags with the first class (<div class= “first”>), second class (<div class= “second”>), menu class (<div class= “menu”>), and content class (<div class= “content”>).
/*sets the style of our first icon*/
.first{
    font-size: 1.5em;
}

/*sets the style of our second icon*/
.second{
    border: solid wheat 2px;
    border-radius: 17px;
    width: 65px;
    padding-left: 5px;
    cursor: pointer;
    margin-right: 5px;
}

/*sets the style of our entire darkmode-menu class*/
.darkmode-menu{
    margin: 20px 60px;
}

/*sets the display of our darkmode-menu class to flex*/
.darkmode-menu ul{
    display: flex;
    justify-content: space-between;
    align-items: center;
}

.darkmode-menu li{
    list-style: none;
    margin-right: 30px;
    font-size: 1.5em;

}

/*sets the style for our content class*/
.content{
    text-align: center;
    margin-top: 200px;
    font-size: 2em;
}
Output:

Now that our webpage looks pretty cool after applying CSS, it is time to move on to our JavaScript code.
JAVASCRIPT CODES
Basically, our javascript will be comprised of three sections. The first section would hold the codes that allow our switch to move from one end to the other when it is clicked on.
The second section would hold the codes that change the theme of the content section when our Dark mode switch is toggled.
The last section would hold the codes that change the theme of our Darkmode navigation bar when our switch is toggled upon.
First section
let darkSwitch = document.querySelector(".second")
darkSwitch.addEventListener("click", ()=>{
    darkSwitch.classList.toggle("active")
})
If you are unfamiliar with JavaScript, here is what the above codes imply
1. let darkSwitch = document.queryselector(“.second”): We are granting JavaScript access to our DOM and requesting that it searches for an element with a class name of second and on finding it, the element should be stored in a variable named darkSwitch.
2. darkSwitch.addEventListener(“click”,()=>{}): Now that JavaScript has stored our element with the class name of second in our darkSwitch variable, we ask that javascript listens to a click event, and once there is a click, a certain function should be invoked.
3. ()=>{darkSwitch.classList.toggle(“active”)}: Since we’ve earlier instructed javascript to listen for click events, we ask that each time there’s a click, javascript should go to the darkSwitch variable and check if our element has an active class. If our element doesn’t have it, then javascript should add it. However, if our element has it, then JavaScript should remove it.
So far, we have succeeded in adding the active class to our div tag with the class second (<div class= “second”>) every time we toggle on it. However, our switch still remains static. To change this, we head to our CSS code and add a transform property to our active class.
/*allows movement of our icon from left to right and right to left each time our switch is toggled on*/
.second.active i{
    transform: translateX(27px);
}
To allow a smooth movement of our switch, we add a transition property
/*allows smooth movement of our darkmode switch*/
.second i{
    transition: 0.4s;
}
Output:
Second section
darkSwitch.addEventListener("click", input)
let contentDarkmode = false
function input(){
    if(!contentDarkmode){
        document.body.style.background = "rgb(7, 32, 7)";
        document.body.style.color = "white"
        contentDarkmode = true
    }

    else{
        document.body.style.background = "rgb(226, 219, 219)";
        document.body.style.color = "black"
        contentDarkmode = false
    }
}
What the above code implies:
1. darkSwitch.addEventListener(“click”, input): Earlier in our first section, we asked that javascript stores our element with the second class in a variable called darkSwitch. Now, we are asking that javascript listens to yet another click event, and once it hears a click, it should invoke a function with the name input
2. let contentDarkmode = false: Now that javascript is on the lookout for clicks, we are asking that in addition to that instruction, it creates a variable called contentDarkmode and sets it to a boolean value of false.
3. If (!contentDarkmode){document.body.style.background = “rgb(7, 32, 7)”; document.body .style.color = “white”; contentDarkmode = true}: By default, our webpage has a lightmode which means Darkmode is false. However, we are requesting that javascript sets up a logical condition within our input function and this condition should be that when javascript hears a click event and light mode is active (contentDarkmode variable is false), then the value of our contentDarkmode variable should be changed to true thereby changing the color of our background to a dark shade of green and the color of our fonts to white.
4. else {document.body.style.background = “rgb(226, 219, 219)”; document.body .style.color = “black”; contentDarkmode = false}: However, when our webpage is displaying a Darkmode and javascript hears a click event, then our contentDarkmode variable should revert to false thereby changing the background color of our webpage to a darker shade of white and the color of our fonts to black.
Output:
As you can see from the result above, our code doesn’t implement a dark mode on our navigation bar. This is where the javascript code of our third section comes in.
Third section
let menu = document.getElementById("Darkmode")
darkSwitch.addEventListener("click", output)
let menuDarkmode = false
function output(){
    if(!menuDarkmode){
        menu.style.background = "rgb(20, 20, 20)"
        menu.style.color = "white"
        menuDarkmode = true
    }

    else{
        menu.style.background = "white"
        menu.style.color = "black"
        menuDarkmode = false
    }

}
What the above code implies:
1. Let menu = document.getElementById(“Darkmode”): We are requesting that JavaScript gain access to our DOM and search for an element with an id of Darkmode and on finding it, should store it in a variable called menu.
2. darkSwitch.addEventListener(“click”, output): To our darkSwitch variable, we are requesting that a third event listener be added. This implies that javascript should listen to click events and on hearing one should invoke a function named output.
3. let menuDarkmode = false: Now that javascript is on the lookout for events, we are asking that it create a variable named menuDarkmode and set its value to a Boolean value of false.
4. If (!menuDarkmode){menu.style.background = “rgb(20, 20, 20)”; menu.style.color = "white"; menuDarkmode = true}: By default, our navigation bar is set to light mode which means that Darkmode is false. However, we are asking JavaScript to set up a logical condition within our output function and this condition should be that whenever a click event is heard and our webpage is displayed in a light mode (menuDarkmode = false), then the value of our menuDarkmode variable should be changed to true thereby setting the background color of our navigation bar to a lighter shade of black and the color of our navigation fonts to white.
5. else {menu.style.background = “white”; menu.style.color ="black"; menuDarkmode = false}: However, when our navigation bar is displaying a Darkmode (menuDarkmode = true) and javascript picks up a click event, then our menuDarkmode variable should revert back to false, thereby changing the background color of our navigation bar to white and the font color to black.
Output:
Further improvements
From the looks of things, we have succeeded in implementing a dark mode feature on our webpage. However, certain improvements can be made to make this feature on our webpage even better.
one of these improvements is in how our theme transitions between light mode and dark mode, and vice-versa.
to allow for a smooth transition, we will add a transition property to our body (<body>) and darkmode (<div id="Darkmode">) elements.
body{
    transition: background 0.5s, color 0.5s;
}

#Darkmode{
    transition: background 0.5s;
}
Final result
Codepen Result:
Conclusion
Thank you for reading this article to the very end. I believe at this stage, implementing a dark mode feature on your project would be nothing short of easy.
I would advise you practice implementing this feature with various themes across various web pages.
Thanks.


